Up Tempo - Advanced Features
This guide explains how to use the advanced features in Up Tempo. These can be found underneath the Pitch and Tempo controls for any track. They are only available in the pro version of Up Tempo.
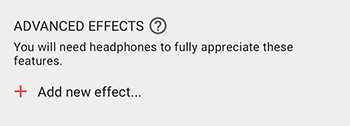
These features will work best with headphones as your device’s speaker is unable to play the whole range of sounds.
Adding a New Effect
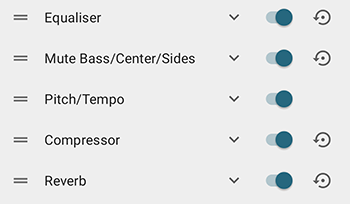
Tap ‘Add new effect..’ to get started. You will then be able to add one of the following:
Compressor - reduce your track’s dynamic range
Cut Section - remove a section of track
Delay - add echoes or increase the stereo width
Equaliser - 5 band eq
High Pass Filter - get rid of the low frequencies
Low Pass Filter - get rid of the high frequencies
Mute Bass/Center/Sides - isolate vocals, remove bass, etc
Noise Gate - cut out quiet parts of the sound
Panning - left to right, right to left
Pitch/Tempo - adjust pitch or tempo of a section
Reverb - add some space
Ring Modulator - robot voices
These can be added to the track as a whole, or to a section of the track between 2 markers. You can add as many effects as you like and they will build incrementally in the order which they are listed.
Editing Effects
Once you have added effects you can long press to delete them from the list, or use the drag handles to re-order the effects.
Each effect will have a toggle button turn the effect on/off. If you can’t see the controls for the effect tap on the arrow next to it’s name.
Pitch/Tempo
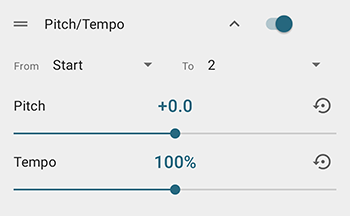
These controls are the same as the main pitch/tempo controls at the top of the screen. However they can be applied between 2 markers only (instead of to the track as a whole). They will build on any whole track changes that you have made. So, for example, if you have changed the whole track to 110 % tempo, and then change section 2 to 3 by 110%, section 2 to 3 will actually change by 121%.
Mute Bass/Center/Sides
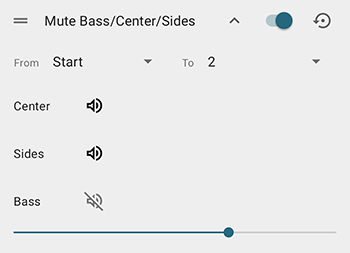
The Mute Bass control allows you to isolate and remove low frequency sounds. This is useful if you want to remove the bass from your track so that it is easier to hear the main tune or speech.
Tap on the volume icon to toggle the base on/off. The slider lets you calibrate the range of frequencies that you cut out.
Stereo audio files are often recorded to sound like some instruments are in the centre (the centre channel) and some are out to the sides (the side channel). Similarly soundtracks will often have speech in the centre and ambient background noises out to the sides. Up Tempo can attempt to separate the sounds in the centre of the sound stage from the those at the side. Tap on the volume icons to turn on/off the side or centre channels. This can be helpful in isolating vocals and/or lead instruments as they will often play in the centre channel. If you output the side channel only it will often almost completely remove vocals and lead instruments, giving you something like a karaoke track.
The effectiveness of the channel isolation algorithm will vary from track to track.
Equaliser
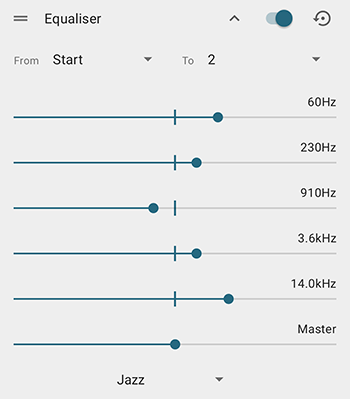
A 5 band graphic equaliser with master volume control. Use one of the presets or adjust the sliders to shape the sound as necessary.
Cut section

The cut section option can be used to remove part of your track. You will need to have placed markers on the track at the edges of the section that you want to remove. The section will then no longer be played.
Panning
The panning effect can be used to move sounds from the left audio channel to the right and vice versa. The ‘left channel input gain’ adjusts the volume of the sound on the left channel coming IN to the effect. The ‘left channel panning’ will affect which audio channel the sound from the left input channel comes out from - move it to the left to keep the sound on the left, move it to the right to have the sound come out on the right, or put it somewhere in between.
Reverb
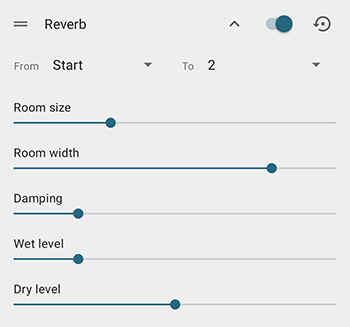
Reverb makes it sound like the track is playing in a larger space by simulating the echoes that occur from the walls, floors, ceiling, etc. This can give recordings a bit more life (like singing in the bathroom). It’s normally best to have reverb as the last effect in the chain.
‘Room size’, ‘Room width’ and ‘damping’ all affect how big the room sounds. ‘Dry level’ is the volume of the original sound and ‘Wet level’ is the volume of the echoes/reverberation sound.
Compressor
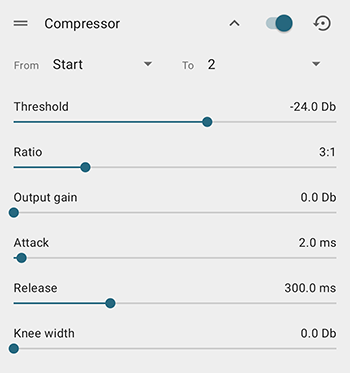
When your track has a high dynamic range (very loud and very quiet parts) it can be difficult to hear - either the loud bit is too loud or the quiet bit is too quiet. Compressors help with this by making the loud parts of the track quieter, giving a more consistent volume level. It’s normally best to have a compressor early on in the effects chain.
The ‘threshold’ control sets the level above which things start getting made quieter. The ratio control sets how much quieter things become (high ratios squash the sound more). ‘Output gain’ can be used to boost the volume of the entire track back up to compensate for the compression making it quieter. ‘Attack’ and ‘release’ control how quickly the compression kicks in and fades out. ‘Knee width’ can be used to soften the effect of the compression for sounds that are close to the threshold (so the compression ratio will be lower for sounds near the threshold), which can make the compression less obvious to the listener.
High Pass Filter
A High Pass Filter removes the low frequencies from a sound (high frequencies are allowed to pass). Adjust the cut-off frequency as desired. The Q-factor controls how sharp the frequency cut off is.
Low Pass Filter
A Low Pass Filter removes the high frequencies from a sound (low frequencies are allowed to pass). Adjust the cut-off frequency as desired. The Q-factor controls how sharp the frequency cut off is.
Delay
The Delay effect will add ‘echoes’ to your track, which can be used to achieve a range of interesting effects.
The ‘delay’ control determines how soon you hear the echo after the original sound. The ‘feedback’ control affects how many echoes you hear, and the mix control lets you adjust how loud the echoes are compared to the original sound.
With the mono delay setting the same delay, feedback and mix are applied to the left and right audio channels. Turn on the ‘stereo’ switch and you can set the parameters differently for the left and right channels.
The ‘high pass filter’ and ‘low pass filter’ can be used to shape the sound of the echo in the same way as the High Pass Filter and Low Pass Filter effects.
Try setting the delay to around 80ms, drag the feedback slider all the way to left (so you only get one echo) and set the mix around one third of the way from the left. This gives a ‘slapback’ delay popular in 50s pop vocals. Switch on the stereo delay and use the same settings on both channels but with slightly different delay times (e.g. 80ms and 90ms) for a more dramatic effect.
Noise Gate
The Noise Gate will cut out sounds below a certain volume level as determined by the ‘threshold’ control. If there is unwanted background noise during gaps in the track the noise gate can help to cut them out.
Ring Modulator
Use the Ring Modulator to recreate classic sci-fi robot voices. Play with the ‘modulation frequency’ and ‘distortion’ to achieve an interesting affect.
You can find an interesting discussion of how this effect was used at the BBC Radiophonic Workshop